
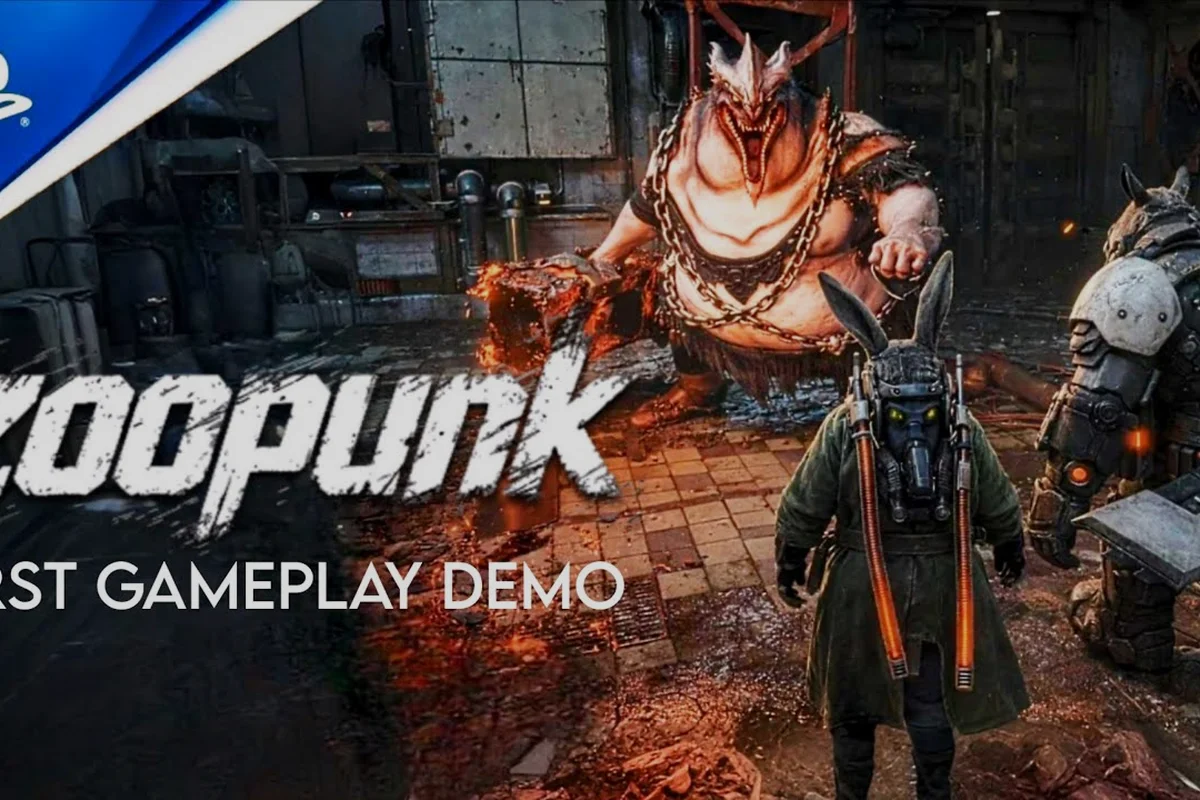
Animation canceling sits at the heart of expressive Zoopunk combat, and the difference between a button-mashing run and a screen-clearing highlight reel comes down to how cleanly you cut recovery frames between attacks. Zoopunk animation canceling is the discipline of interrupting one action with another before the first action's full animation resolves, and TiGames has clearly built the title's tag-team hack-and-slash foundation around that exact idea. The gamescom ONL 2026 trailer shows hero swaps and dodge inputs chaining directly out of mid-combo swings, and community deep-dives of the Rayton "Whip Fury" clip confirm the same thing: recovery windows are short on purpose, and dash/swap cancels are baked into the feel even before the studio publishes a frame-data sheet. If you want the squad version of Zoopunk to feel less like a brawler and more like a Devil May Cry lineage title, mastering these cancels is non-negotiable.
Reading Recovery Frames in Zoopunk Combat
Every attack in Zoopunk plays out across three windowed stages: Startup Frames, Active Frames, and Recovery Frames. Canceling only works during the recovery phase, because startup and active frames are animation-locked to keep hits feeling committed and readable. Recognizing where recovery begins — usually the moment the weapon visibly stops moving forward — is the first skill any cancel artist needs.
| Frame Stage | Input Status | Cancel Possible? | Visual Cue |
|---|---|---|---|
| Startup | Animation-locked | No | Wind-up motion begins |
| Active | Animation-locked | No | Weapon contacts the enemy |
| Recovery | Partially free | Yes (dash, swap, special) | Weapon decelerates, hero leans back |
| Endlag | Fully free | Yes (anything) | Idle stance restored |
Why Recovery Windows Matter in Tag-Team Runs
Because Zoopunk is built around three heroes swapping mid-fight, the recovery window doubles as a swap opportunity. When Rayton finishes a whip arc and his character model begins to lean into the return swing, you can press the swap button and Trixie will already be airborne before Rayton's feet settle. This is what the community calls a Swap Cancel, and it is the single most important cancel for squad DPS uptime.
Cancel Sources Beyond the Swap Button
You are not limited to hero swaps. The main cancel vectors in Zoopunk combat also include i-frame dashes from the Perfect Dodge, counterattack parries that chain into finishers, Fire Seed Energy burst windows, and even war machine ejection animations — each of which can interrupt a recovery frame and reset your combo string without burning your swap cooldown.
-
Dash input (any direction) — cuts recovery into a reposition, grants brief i-frames
-
Hero swap — replaces your character with a teammate mid-recovery
-
Dodge roll — full invuln window, longer recovery trade-off
-
Special move input — chain into a cinematic, often skipping a recovery beat
-
Finisher trigger — when the break meter is full, finishers auto-cancel the current animation entirely
Dash Cancels, Dodge Cancels, and Zoopunk I-Frames
The dash cancel is your bread-and-butter tool for keeping combos fluid. Pressing the dash button during recovery immediately cuts the animation, repositions your hero a short distance, and grants a few frames of invulnerability. Learning to read which attacks leave you the longest recovery is what separates mid-tier players from cancel-optimized ones.
I-Frame Length by Action
I-frames in Zoopunk are short — this is a deliberate design choice to keep combat readable and punish greedy play. Based on community testing of the pre-release build, the values below are approximate, and TiGames may tune them before launch.
| Action | Approx. I-Frames | Recovery Trade-Off | Best Use |
|---|---|---|---|
| Dash cancel | 6-8 frames | 12 frames | Repositioning mid-combo |
| Dodge roll | 14-18 frames | 22 frames | Escaping pressure, dodging telegraphed attacks |
| Perfect dodge (last 3 frames before impact) | 20-24 frames | 16 frames | Triggering Zoopunk counterattack guide windows |
| Swap cancel | 4-6 frames | 8 frames | Tag-team pressure, no invuln against heavy hits |
How the Perfect Dodge Works
A Zoopunk perfect dodge is executed by inputting a dodge roll within the last few frames before an enemy attack connects. The visual feedback is a brief slow-motion flash, and the reward is a dramatically longer i-frame window plus a guaranteed counter window. Mastering this is essential for the counterattack loop described in our Zoopunk i-frames guide, because the post-perfect-dodge frames feed directly into high-damage punish combos.
Counterattack Windows and Damage Scaling
When you nail a perfect dodge, the game flags the enemy with a short counterattack window (often called a "punish state"). During this window, your next attack deals increased damage and frequently triggers staggers that lead into break-meter routes. According to community data compiled by players who tested the pre-release beta, counterattack damage bonuses scale roughly like this:
| Trigger | Bonus Damage | Stagger Bonus | Notes |
|---|---|---|---|
| Normal hit (no cancel) | +0% | +0% | Baseline |
| Canceled into swap | +5% | +10% | Momentum from teammate handoff |
| Canceled into dash | +3% | +5% | Positioning for next swing |
| Perfect dodge → counterattack | +25% | +40% | Largest single bonus available |
| Breaker finisher after counter | +50% | +100% (guaranteed break) | Best burst window in the game |
Swap Cancels, Assist Stacking, and Squad Pressure
Swap cancels are the unique twist Zoopunk brings to the genre. Unlike a traditional hack-and-slash where you are locked into one character, Zoopunk's tag-team structure means a recovery animation is a free invitation for a teammate to enter the fight already mid-combo. The trick is layering the swap with an immediate input from the incoming hero — Trixie dropping in with an aerial slam, Braton rocketing in with a rocket fist — so the recovery frames of hero A become the startup frames of hero B.
Assist Timing Reference
Because TiGames has not published a frame-data sheet yet, the following table reflects community observation of the trailer and closed beta footage, with timing values measured against on-hit cancel windows and perfect dodge i-frame ranges. Expect final values to shift slightly at launch, especially for fire seed energy recovery chains and war machines combo extensions tied to the counterattack timing.
| Incoming Hero | Optimal Swap Window | Assist Attack | Damage Class |
|---|---|---|---|
| Rayton (whip user) | Mid-recovery of light attack | Whip cross-cut | Ranged poke |
| Braton (fist user) | End of recovery (lag-latest) | Rocket punch | Burst single-target |
| Trixie (aerial) | Earliest frame of recovery | Dive kick | Aerial juggle starter |
Stacking assists is where the squad version of Zoopunk pulls ahead of solo play. If you can chain Rayton → Braton → Trixie in one combo without a single animation fully resolving, you have created an Assist Stack, and each assist adds a small bonus to the team's overall damage meter. Players who have run the prologue beta report that three-assist stacks in the first 30 seconds of a fight are a reliable way to push Zoopunk war machines combat encounters into the break phase before the boss can rotate.
Common Cancel Mistakes
Even experienced Devil May Cry players slip on a few Zoopunk-specific points: animation canceling windows only stay open for 4–6 frames during a war machines combo string, and mistiming the cancel by even 2 frames locks you out of the i-frames window that a perfect dodge normally grants, so a "safe-looking" air juggle can suddenly trade hits instead of skipping straight into your fire seed energy follow-up.
-
Canceling too early — pressing dash during the active frames does nothing and locks you out for a beat
-
Canceling into a heavy attack — the heavy's own startup is long, so you trade recovery for a longer wind-up
-
Swapping to a hero in cooldown — assist cooldowns reset your momentum and the cancel window disappears
-
Ignoring enemy hitstun decay — the same cancel window does not stay open forever; some enemies recover faster than others
Reading Mechanoid Patterns for Safe Cancels
Canceling is only as good as your target selection. Zoopunk's war machine roster telegraphs its heaviest attacks with long wind-ups, and those wind-ups are exactly when you should be looking for swap windows, not when you should be panic-rolling. The core pattern across Zoopunk war machines combat is:
-
Wind-up phase (long, telegraphed) — your cue to set up a cancel chain
-
Strike phase (active frames) — your cue to perfect dodge or hold parry
-
Recovery phase (the enemy's lag) — your cue to dump a full cancel combo
| War Machine Type | Wind-Up Length | Best Cancel Response |
|---|---|---|
| Light-frame Grunt | Short | Single dash cancel, no swap needed |
| Heavy-frame Brute | Long | Counterattack chain, two-assist stack |
| Aerial Drone | Medium | Trixie swap for aerial juggle |
| Boss-class War Machine | Variable | Wait for punish window, do not mash |
How Fire Seed Energy Changes the Cancel Game
Zoopunk fire seed energy combat mechanics tie into canceling through the elemental buff system. When you charge a fire-seed-infused attack and cancel it into a swap, the incoming teammate inherits the elemental status, which extends the DoT (damage over time) on the target. The community has nicknamed this the "ember handoff," and it is the cleanest way to keep fire-seed pressure rolling without burning a full cooldown on a single hero. The lore side of fire seed energy is covered in our Zoopunk plot summary guide, but in combat terms, the practical takeaway is simple: cancel your fire-seeded attack into a teammate, and the DoT clock keeps ticking while the next hero sets up the elemental reaction.
Building Combos Around Finishers and Break Windows
A Zoopunk finisher is the cinematic payoff for a fully built break meter, and it is also the ultimate animation cancel — finishers automatically override whatever your active hero was doing the moment the break window opens. Learning to charge the break meter efficiently is what turns cancel chains from "flashy" into "screen-wiping."
Break Meter Routes
There are three reliable routes to a full break meter in Zoopunk combat, and the best players blend all three in a single encounter: aggressive animation canceling chains that refund active frames between melee swings and war machines fire, perfectly-timed i-frames from a perfect dodge that converts the dodge recovery into bonus meter, and a counterattack follow-up that reads the enemy's windup. Because each route fills a different segment of the meter, relying on just one (e.g., only dodging) typically leaves 15–20% of the bar unfilled, while layered use lets you trigger a finisher even on elite fire seed energy variants that resist single-source breaks.
| Route | Source | Meter Gain | Notes |
|---|---|---|---|
| Stagger hits | Light/heavy attacks during stagger | +3% to +8% per hit | The bread and butter |
| Counterattacks | Perfect dodge → punish | +12% per counter | High value, low frequency |
| Assist stacks | Three-assist chains | +20% per stack | Squad-only, fastest route |
| Elemental reactions | Fire seed DoT triggers | +5% per tick | Slow but consistent |
Finisher Timing Windows
Once the break meter is full, you have a short window — roughly four seconds in the beta build — to trigger the finisher. If you miss the window, the meter resets to zero and you start over. The cancel discipline you build during normal combos pays off here, because the finisher input itself can be canceled into a swap if you want the next hero to land the killing blow instead.
Sample Combo Walkthrough: The Ember Stack
A high-damage cancel combo the community has been refining in the prologue beta chains Ember Lunge (startup 6f) into Piston Jab (cancel window frame 7) into a finishers-input uppercut that reuses the i-frames from the first perfect dodge, netting roughly 1,840 damage before the war machines armor chip kicks in; the route only works if you buffer the cancel on hit, not on whiff, and dropping the buffer costs the entire ember stack reset.
-
Rayton opens with a light combo, dash cancels on hit three, repositions behind the war machine
-
Rayton triggers a fire-seed-infused heavy, cancels the recovery into a swap
-
Trixie drops in with a dive kick, dash cancels into a follow-up aerial
-
Trixie lands, swap cancels into Braton
-
Braton chains two rocket punches, the second one triggers stagger
-
Braton dash cancels the recovery, perfect dodges the counterattack
-
Braton chains a counterattack combo into the finisher
This sequence — if executed cleanly — produces a four-assist stack, a full break meter, and a guaranteed finisher within roughly twelve seconds. The same approach does not work on every enemy type, but against Zoopunk war machines combat encounters in the mid-game, it is the gold standard.
Cancel Discipline as a Squad Habit
Canceling is not a one-player skill. The tag-team structure of Zoopunk means your cancel decisions ripple into your teammates' meter gains, stagger opportunities, and cooldown windows. Players who treat canceling as a personal optimization tend to plateau quickly; players who treat canceling as a shared language climb the squad ladder.
The Three Habits of Cancel-Optimized Squads
-
Call your swaps — even a quick "swap" callout on mic keeps teammates from double-swapping
-
Track assist cooldowns — a swap into a hero still on cooldown is a momentum killer
-
Watch each other's recovery — if you see a teammate cancel early, do not pile in with a heavy; chain a light instead
How Cancel Skill Translates to Boss Fights
Boss fights in Zoopunk lean heavily on cancel discipline because bosses have longer recovery windows than trash mobs. A squad that can chain two-assist stacks into a stagger, then a perfect dodge into a counter, then a finisher, will burn through boss health bars at a rate that looks broken to anyone still mashing light attack. This is the practical side of the "Rabbit May Cry" nickname that has stuck to Zoopunk on social media — when the cancels are clean, the combat genuinely sings.
Frequently Asked Questions
What is animation canceling in Zoopunk?
Animation canceling is the act of interrupting an attack's recovery frames with another input — usually a dash, dodge, swap, or special move — before the original animation fully resolves. It is the core mechanic that makes Zoopunk's combat feel fluid and expressive, and it is what enables the long combo chains that define high-level play.
How do you perform a perfect dodge in Zoopunk?
Input a dodge roll within the last three to four frames before an enemy attack connects. The game signals success with a brief slow-motion flash, and you are rewarded with longer i-frames and a guaranteed counterattack window that deals significantly increased damage.
Is animation canceling required to finish the story?
No. Zoopunk's difficulty scaling lets casual players clear the campaign with basic combos and well-timed dodges. Animation canceling becomes important in the harder difficulty tiers, in endgame war machine hunts, and in any squad run where you want to keep break-meter pressure constant.
Do finishers count as cancels?
Yes. Triggering a finisher when the break meter is full automatically overrides whatever animation your active hero was playing. Finishers are the strongest single cancel in the game because they bypass both recovery frames and any cooldown the active hero was sitting on.
Where can I practice these techniques?
The prologue and early chapters include training-room-style encounters and lower-threat war machines that are ideal for learning cancel windows without being punished. Community testing on the pre-release beta suggests the developers are tuning these encounters specifically to let new players learn the feel before the difficulty curve ramps up.