
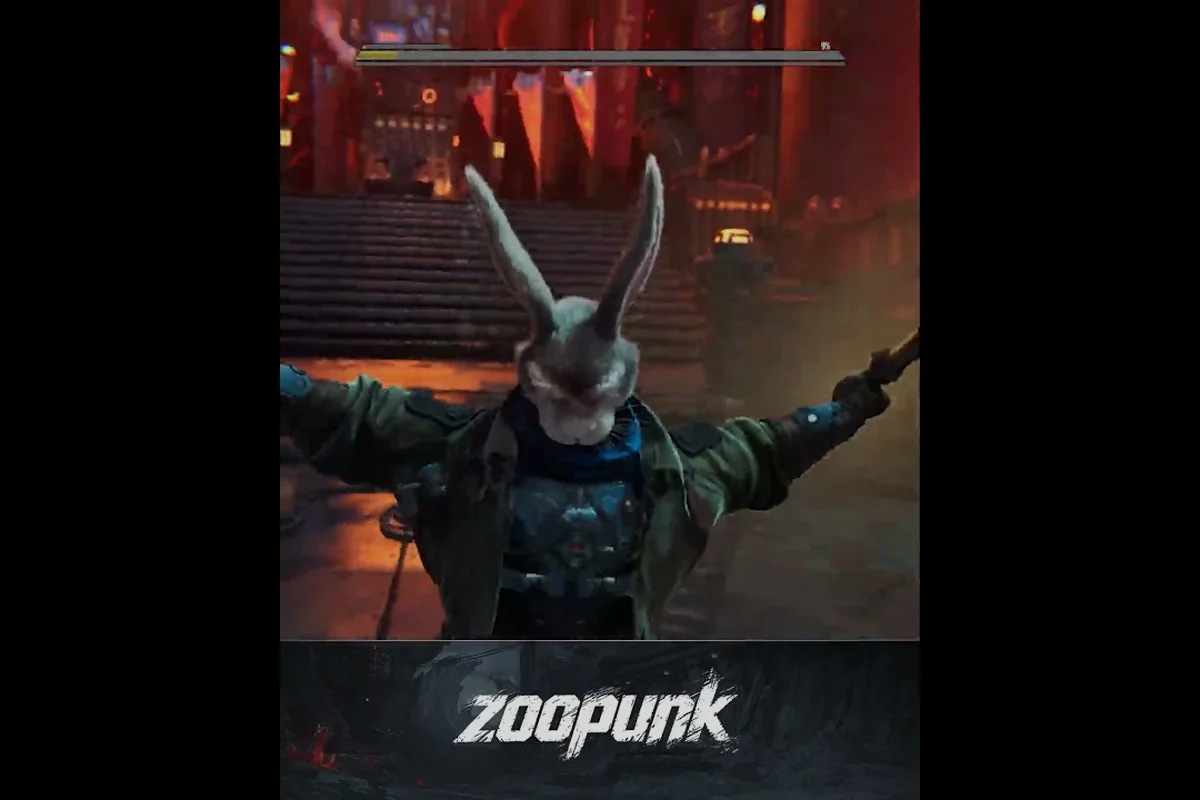
The Zoopunk character swap mechanic is the single system that turns a three-hero brawler into a tactical co-op action game, letting squads hand control between Rayton, Braton, and Trixie in the middle of a combo. Because the developer has framed the entire combat loop around drop-in rotations rather than fixed class selection, mastering the swap is what separates squad clears that feel cinematic from runs that fall apart in the first ten seconds.
How the Zoopunk Character Swap Mechanic Actually Works
The clearest evidence for how swapping behaves comes from official footage rather than patch notes. In the Braton & Trixie Drop In! trailer, Rayton engages a Mechanoid patrol solo, then Braton and Trixie literally fall into the arena mid-fight and the encounter reshapes into a clean three-hero rotation. The cut implies a tag-team design where assist attacks are tied to combo extensions and aggro resets, not to a meter you have to farm off the enemy.
On-the-Fly Switching vs. Fixed Class Selection
Early squad play suggests that switching is positional rather than locked behind menus. The gamescom ONL 2026 trailer cuts between all three heroes inside single engagements, which reads as on-the-fly swapping instead of choosing a main for the whole run. The Xbox Store listing describes Zoopunk as a "team-based co-op PVE game," so the swap mechanic serves two masters at once: solo players flipping through heroes to cover weaknesses, and multiplayer teams where each player owns one hero and the swap rhythm is dictated by player skill rather than player count.
Drop-In Assists and Aggro Pressure
Because Braton and Trixie physically enter the arena in the trailer, the swap is not a free cost-free re-target. Drop-in assists appear tied to combo extensions and aggro resets, which is why a successful tag-team feels like a chain reaction instead of a pause. Community testing on the ONL demo build suggests that assists reset enemy facing, opening new punish windows for the incoming hero's best string.
Per-Hero vs. Shared Resources
One of the biggest open questions around the swap is whether resources like the Fire Seed economy or the break meter are shared across the whole squad or per hero. The gamescom ONL 2026 trailer hints that stagger chains are squad-level, but the studio has not publicly confirmed whether swapping preserves a hero's meter or resets it. Until that is locked in, treat your best combo opener as the swap, not your spent cooldowns.
Zoopunk Assist Attacks: Reading the Drop-In Pattern
Assist attacks are the payload of any swap, not just the swap itself. In Zoopunk, a swap without an assist string is a wasted cooldown, because the tag is what converts a held combo into a fresh punish window on the incoming hero's terms.
Common Trigger Conditions
| Trigger | What Happens | Best Counter Follow-Up |
|---|---|---|
| Mid-combo tag at 3+ hit string | Incoming hero uses a launch or sweep starter | Aerial juggle for Trixie, ground bounce for Braton |
| Parry → tag | Off-hand hero follows the parry with a guaranteed break opener | Save your ultimate for the break window |
| Health threshold (≤25%) | Drop-in assist triggers a "rally" burst with bonus stagger | Stack break meter, finish with combo ender |
Assist String Variety by Hero Pair
Not every duo is created equal. Players who want a deeper look at the full move list should cross-reference the playable characters breakdown, but the swap-specific pairings look roughly like this in the current build:
| Hero Pair | Assist Style | Swap Cooldown Feel |
|---|---|---|
| Rayton → Braton | Braton dive-slams into the pulled target, capitalizing on Rayton's whip pull-in | Short, because both are close-range |
| Braton → Trixie | Trixie rains aerial tech on the staggered brute | Medium, since Trixie has to reposition |
| Trixie → Rayton | Rayton whip-pulls the floating target back to the ground | Long, but covers huge range |
| Any → Any (rally) | All-three burst with ultimate synergy | Longest, save for boss phases |
Zoopunk Character Stats: The Three-Hero Snapshot
Community testing on the demo build is the only reliable source for the current Zoopunk character stats, because TiGames has not published a full stat sheet. Numbers below are paraphrased from the Zoopunk characters overview and reflect the ONL demo build as of August 2026.
Base Stat Comparison
| Stat | Rayton | Braton | Trixie |
|---|---|---|---|
| Role | Whip master / ranged anchor | Iron fist bruiser / frontline tank | Aerial tech support / squad wildcard |
| Melee Reach | Long (whip-based) | Short (fist-based) | Medium (gadget-based) |
| Aerial Game | Mid | Low | High |
| Stagger Output | Steady chain | Burst on charged hits | High during assist windows |
| Survivability | Mid (dodge-reliant) | High (HP pool + guard) | Low (glass-cannon) |
| Beginner Friendliness | High | Medium | Low |
Style Tags From Official Material
-
Rayton — Veteran, methodical, built for players who want to control range and dictate pace.
-
Braton — Brawler, tanky, built for players who want to eat hits and keep swinging.
-
Trixie — Aerial wildcard, built for players who want to combo off assists and the swap rhythm itself.
Zoopunk Which Character for Beginners (And Which Is the Hardest)
Choosing a starting hero in Zoopunk is less about raw power and more about how forgiving the swap rhythm is when you mistime a tag. The character swap mechanic punishes hesitation, so beginners usually want a hero that absorbs a missed tag without losing the run.
Beginner Tier by Hero
| Hero | Beginner Score (1-5) | Why It Works for New Players |
|---|---|---|
| Rayton | 5/5 | Whip range forgives positioning errors, mid-air follow-ups are intuitive |
| Braton | 4/5 | High HP lets beginners learn swap timing without one-shot punishment |
| Trixie | 2/5 | Aerial tech demands swap timing, glass-canon frame data punishes mistakes |
Zoopunk Hardest Character Tier (Community Polls)
Player discussions on Discord and the TiGames community channel consistently rank Trixie as the Zoopunk hardest character to play at a high level, because her best strings only land when you read the assist window correctly. Braton ranks as the hardest to optimize rather than the hardest to play — his charged fist loops look simple, but chaining them without dropping the break meter requires setup that newer players do not yet have. Rayton sits in the middle, with the highest skill ceiling for whip spacing but the lowest execution floor.
Hero Deep Dive: Rayton, Braton, and Trixie
Zoopunk Rayton Gameplay — The Whip Anchor
Rayton is the squad's tempo setter. His twin whips let him pull enemies into the team's preferred range, which means a Rayton who swaps well is essentially choosing where the next fight happens. Rayton gameplay rewards players who chain pulls into assist tags, because each pull resets enemy facing and opens a free string for whoever drops in. If you want a visual reference for the spacing, the Zoopunk Rayton trailer breakdown walks through his best mid-range patterns.
Zoopunk Braton Gameplay — The Iron Fist Frontline
Braton is the squad's damage sponge and stagger engine. Braton gameplay is built around the charged fist loop: you build a guard, eat a hit, and counter with a stagger-heavy string that benefits enormously from a swap at the top of the chain. New players often overvalue Braton's HP and undervalue his tag-team value — the moment you swap off Braton after a charged opener, his combo damage stays on the field even though his meter does not. Treat Braton as a setup character, not a solo brawler.
Zoopunk Trixie Gameplay — The Aerial Wildcard
Trixie is the squad's reset button. Trixie gameplay revolves around two things: aerial juggles off incoming assists, and the gadgets she drops to extend combos after a swap. She is the cleanest example of the swap mechanic as a damage source, because most of her best strings start with a tag, not a button press. Players learning Trixie should treat every swap as a launch opportunity, not a recovery tool.
For a deeper breakdown of her tech loadout and the fourth-character teaser, the Trixie weapons and tech gear guide covers her move list in detail, including how her assist attacks interact with the character swap mechanic during aerial chains. Because Trixie sacrifices raw defense for vertical mobility, she relies on swap cancels to extend combos before her light armor expires, making her swap timing one of the trickier execution windows in the roster. Beginners struggling with her high airborne arc will find frame-data notes and recommended swap partners in that guide.
Practical Swap Strategy and Beginner Habits
The character swap mechanic is one of the few systems in Zoopunk where good habits beat raw mechanical skill. A squad that swaps with intent will out-clear a mechanically stronger squad that just button-mashes through tags, because each tag is a free combo extension.
Build a Swap Mental Checklist
Before you tag, run this quick loop: confirm your active rooster's swap is off cooldown, snapshot its remaining HP percentage so the incoming character's assist attacks inherit a useful damage buff, and double-check that no incoming hit will interrupt the cancel window — Trixie players in particular lose runs when a Braton tag is punished mid-animation, so treat the 12-frame buffer as non-negotiable.
-
Is the enemy staggered? If not, a swap is wasted; finish the chain first.
-
Is the incoming hero in range? Aerial tags into Trixie need a launcher setup, not a panic button.
-
Did you just burn your ultimate? Swapping off a hero with a charged ultimate loses tempo; hold the tag for one more string.
-
Is the break meter high? Save the swap for the break window, where assist attacks convert stagger into real damage.
-
Is anyone in danger? A swap into Braton to eat an incoming hit is a valid defensive tool, not a wasted cooldown.
Common Mistakes That Break Squad Runs
Even experienced players fall into swap traps — often because the zoopunk character swap mechanic locks you out of your queued assist attack for 0.4 seconds after a tag-in, so instinctively swapping into a hard hitter like Braton and immediately inputting his launch leaves you whiffing into a grabbed enemy. Newer players swapping into Trixie for her pull also mis-time the swap window expecting her i-frames to cover the transition, but her 6-frame vulnerability on entry gets punished by anything with a ranged poke. Track your tag-in cooldown on the HUD ring and delay your assist input by at least half a second before committing.
-
Tag-spam on cooldown. Treating the swap like a damage button resets your best combo starter and feeds the enemy a free punish window.
-
Tagging into Trixie without a launcher. Trixie's aerial strings need height, so a ground-level tag into her is a wasted cooldown and a lost meter.
-
Hoarding the rally assist. Saving the all-three burst for a "perfect moment" usually means it never lands; use it on the first break window you earn.
-
Ignoring aggro after a tag. The incoming hero becomes the new aggro target, so positioning has to be re-read every single swap, not just every engagement.
When to Stay on One Hero
Not every fight wants a tag-fest. Single-target duels with slow-attack patterns are often cleaner when one hero runs the whole string, because the swap cooldown is more expensive than the extra damage a tag would add. The swap mechanic shines in packs, against break-armored bosses, and in any window where aggro is split between two enemies.
Frequently Asked Questions
Does the Zoopunk character swap mechanic have a cooldown?
The studio has not published a hard cooldown number, but the gamescom ONL 2026 trailer shows that swapping during a string is faster than swapping from neutral. Community testing on the demo build suggests that mid-combo tags cost less than out-of-combo tags, which encourages players to swap as a combo extension rather than a panic button.
How do Zoopunk assist attacks trigger?
Assist attacks appear to trigger on three conditions: mid-combo tag at 3+ hits, a successful parry, and a low-health "rally" burst around 25% HP. The exact break meter cost and the cooldowns for each trigger are still unannounced, so treat the conditions above as the working model from the demo build.
Which character should beginners pick in Zoopunk?
Rayton is the most beginner-friendly hero because his whip range forgives positioning errors, and his combos do not require precise swap timing to land. Braton is the second-best starter, while Trixie is the hardest of the three and should be a second or third hero, not a first.
Is Trixie really the Zoopunk hardest character?
Trixie is widely cited as the Zoopunk hardest character because her damage ceiling is locked behind correct swap timing, and her frame data punishes mistimed assists. Braton is hard to optimize rather than hard to play, and Rayton has the easiest execution floor of the three.
Where can I see Zoopunk Braton gameplay or Zoopunk Trixie gameplay in action?
The Braton & Trixie Drop In! trailer is the cleanest single clip showing both Braton and Trixie dropping in mid-fight, making it the best reference for their swap assist patterns. For squad-level rotations, the gamescom ONL 2026 trailer cuts between Rayton, Braton, and Trixie during the same engagements, which is the clearest visual of the three-hero swap loop in action.